Using the Short code is effortless and trouble-free
Just 4 quick steps and generate a KEYWORD for your short code

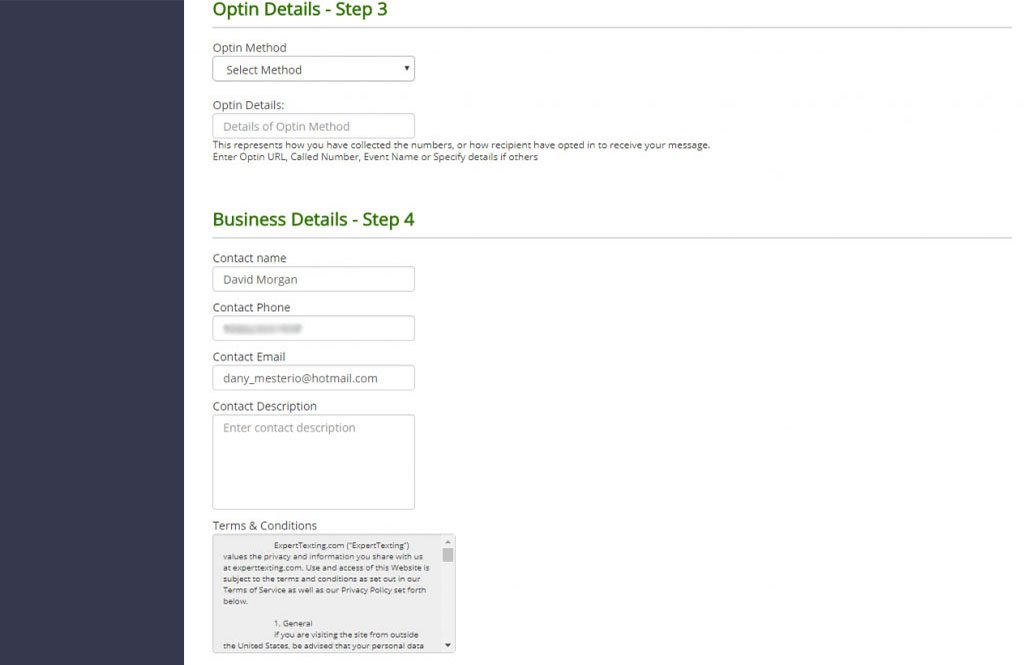
Enter username and password & Go to “Customer Area”
At left, you will see the category of “Short Code Services”
By clicking it, you will have two sub-categories
a)Keywords b)Campaigns
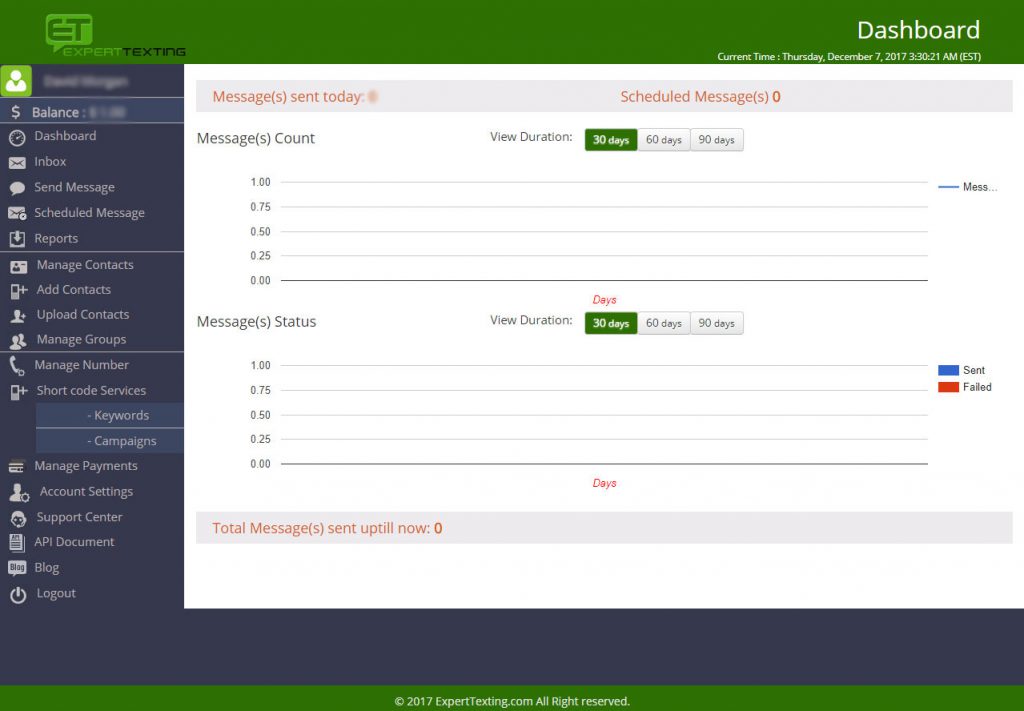
Next, you will enter in the Keywords section
Click “Create Keyword” located at the right top of the page
Remember: A short code cannot be allotted without a Keyword
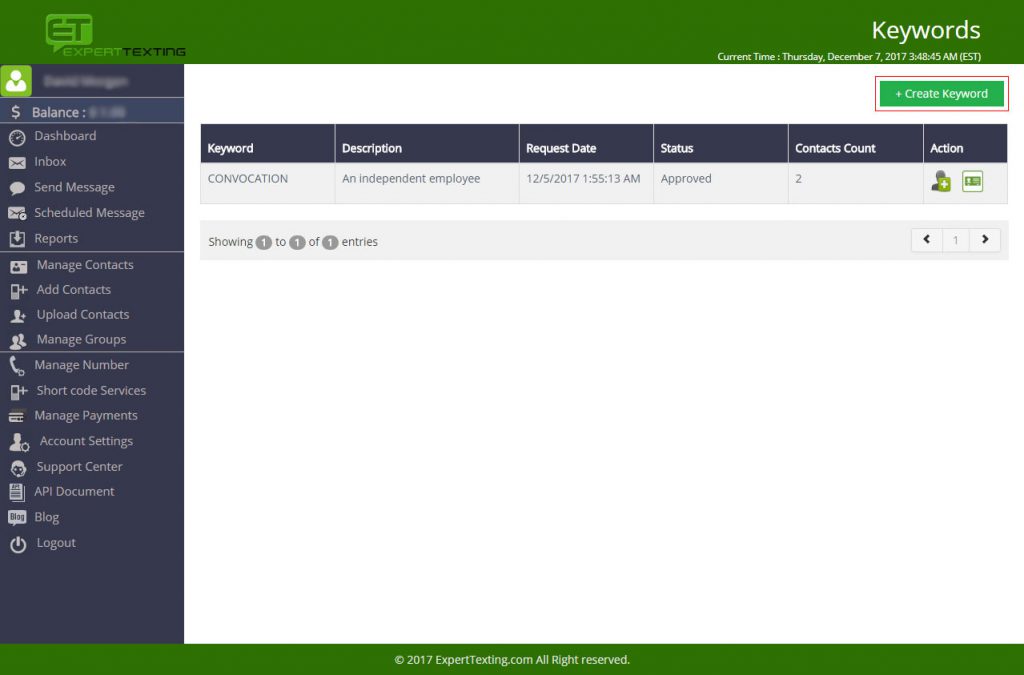
STEP 1: CREATE A KEYWORD
*Setting up a KEYWORD is a one time process
Assign a Keyword to your Short Code
Examples: PIZZA, FOOD, MENSWEAR etc
Enter your Keyword and Click “Next”
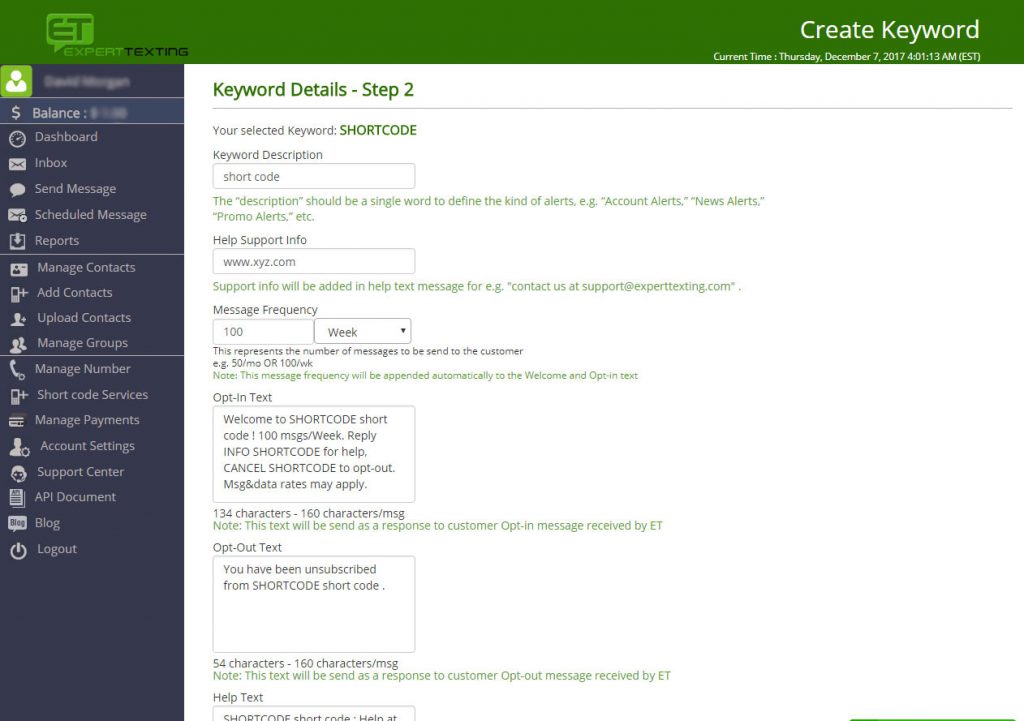
STEP 2: KEYWORD DETAILS
Provide Keyword Details for the following sections
1)Keyword Description 2)Help Support Info 3)Message Frequency
Keyword Description: is to be of a single word
This description will determine the nature of your campaign
For example: Education, Clothing, News, and so on
Help Support Info: (An automated text)
This will be generated whenever your recipient will ask for help/support
For example: contact us at support@experttexting.com
Message Frequency:
It determines how many text messages you are willing to send
Note : You can set the number of messages for a single week or month
It depends upon your convenience what you wish to choose
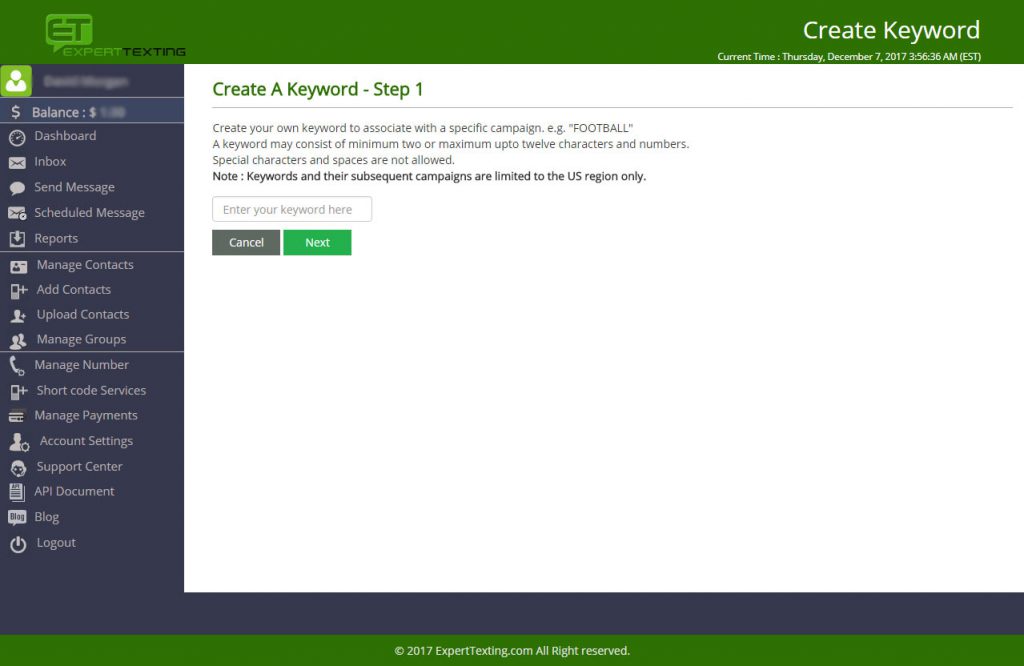
STEP 3: OPT-IN DETAILS
This won’t take long!
Simply pick an option from the list of given methods.
Add Opt-in Details: (Verification of Subscriber’s database)
Write down the source from where you have gathered contact numbers
Example: (Call/Event/Survey/Newsletter/Subscription Form etc.)
STEP 4: BUSINESS DETAILS (Short Code)
All basic information will be generated automatically
Only a short description about your business is required. And that’s it!
Tick mark the box to abide Terms & Conditions
Click “Submit” and you will have a KEYWORD within few hours
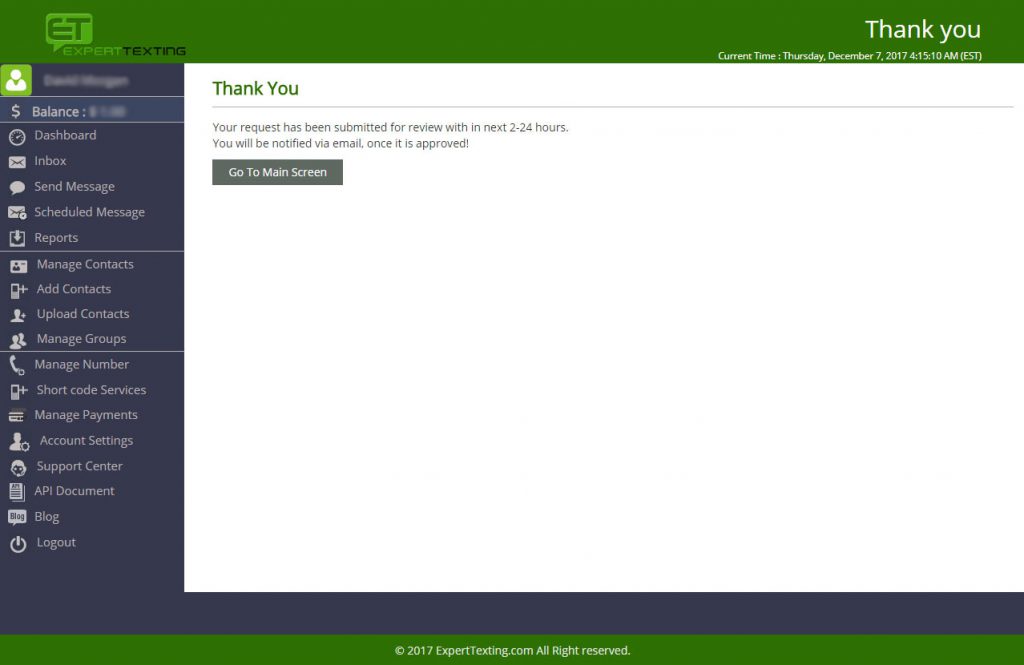
NOTE: An approval is required for allotting a Keyword
Go to Main Screen
The Keyword will be allotted after the approval
Finally, Add Contacts to your Keyword
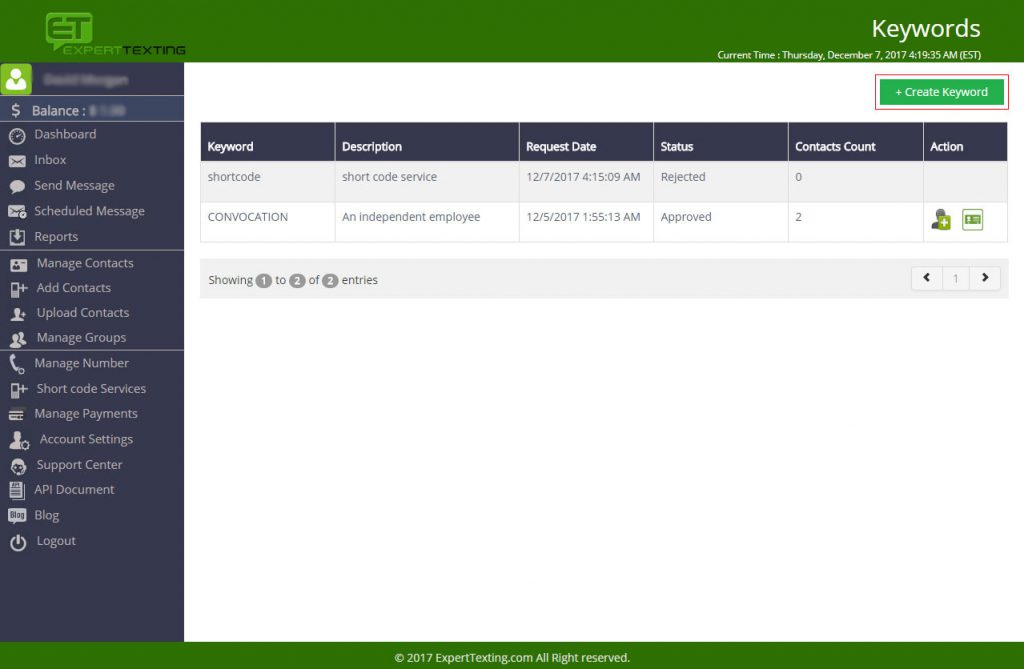
Q: How to Upload or Import Contacts?
Ans: Here’s your answer
Click “Upload Contacts” and you will be directed to a new page
Browse your Contact file and then Click “Import Contacts”
Also, tick mark the compliance box of Terms and Conditions
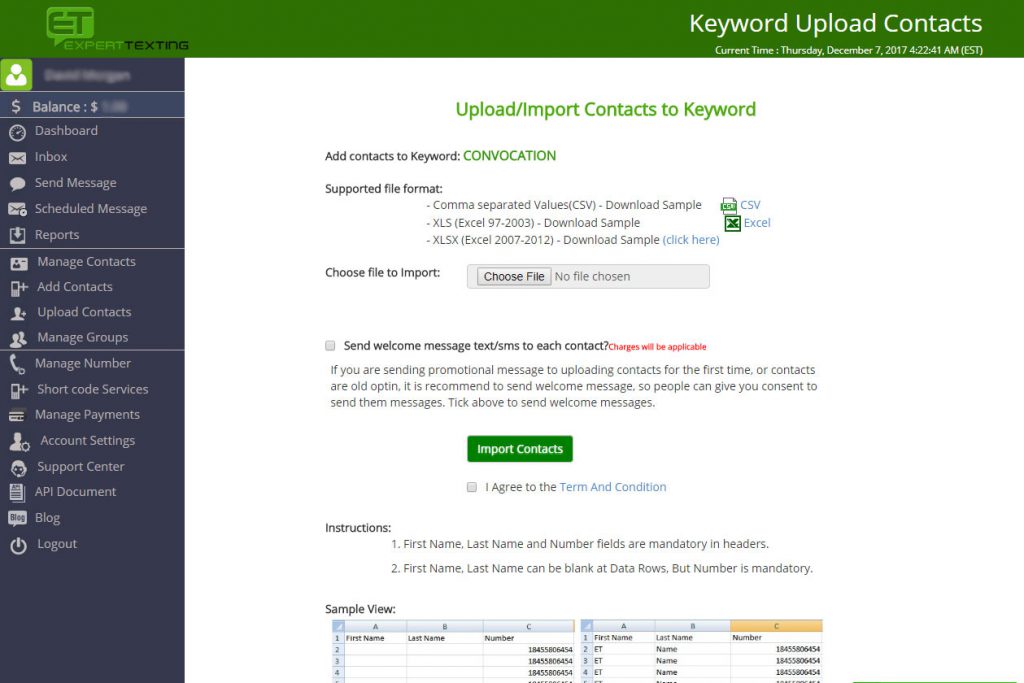
*Our supported file formats are:
1) Comma Separated Values (CSV)
2) XLS (Excel 97-2003)
A download sample has also been shared for guidance
(Instructions are given to add names and numbers in the contact list)

